How to Add ElevenLabs Voice to Your Website
A step-by-step guide to adding AI text-to-speech to your website using TTS2Go and the React SDK. Takes about 10 minutes.
What you'll need
- A TTS2Go account (free, no credit card required)
- A React project (React 18+)
Getting Started
Before writing any code, you need three things from the TTS2Go dashboard: an API key, a project ID, and a voice ID.
1Create an account
Sign up for free at tts2go.com. No credit card required.
2Create a project

3Copy your project ID

4Create an API key
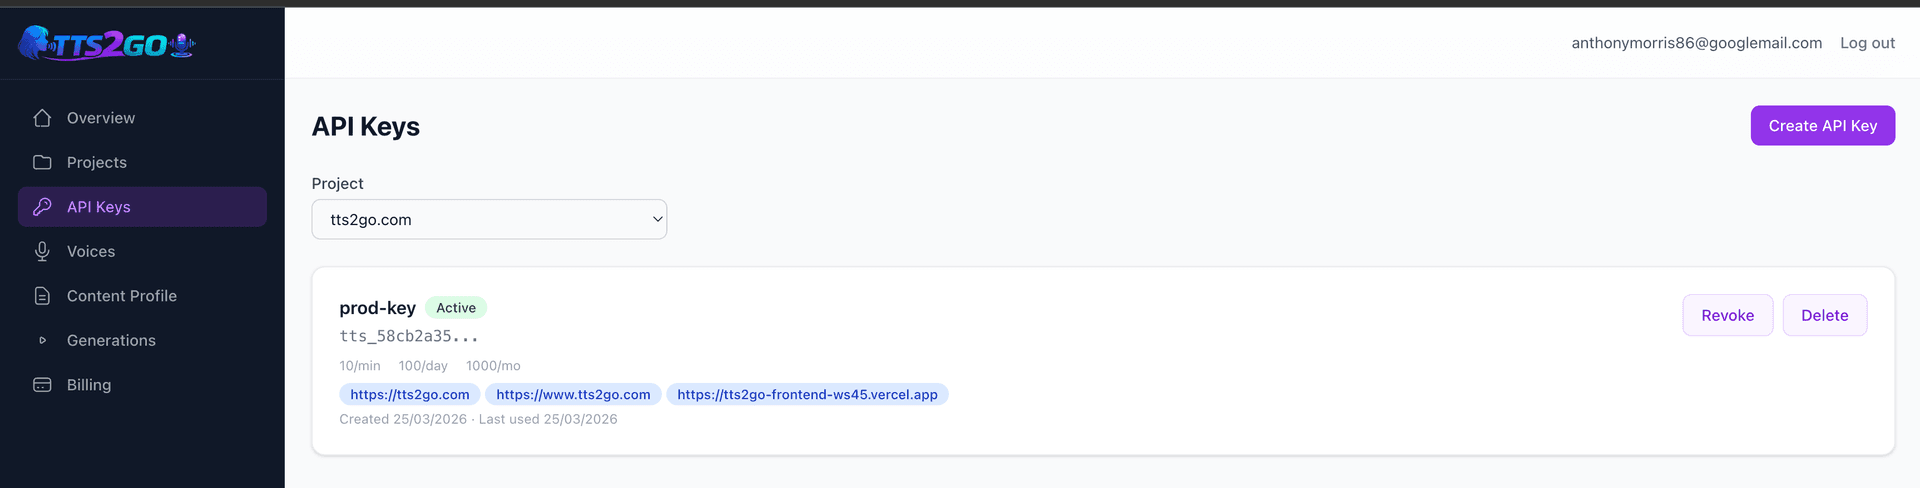
5Configure the API key
Set the domain you expect to receive TTS requests from and a rate limit to protect your credits.
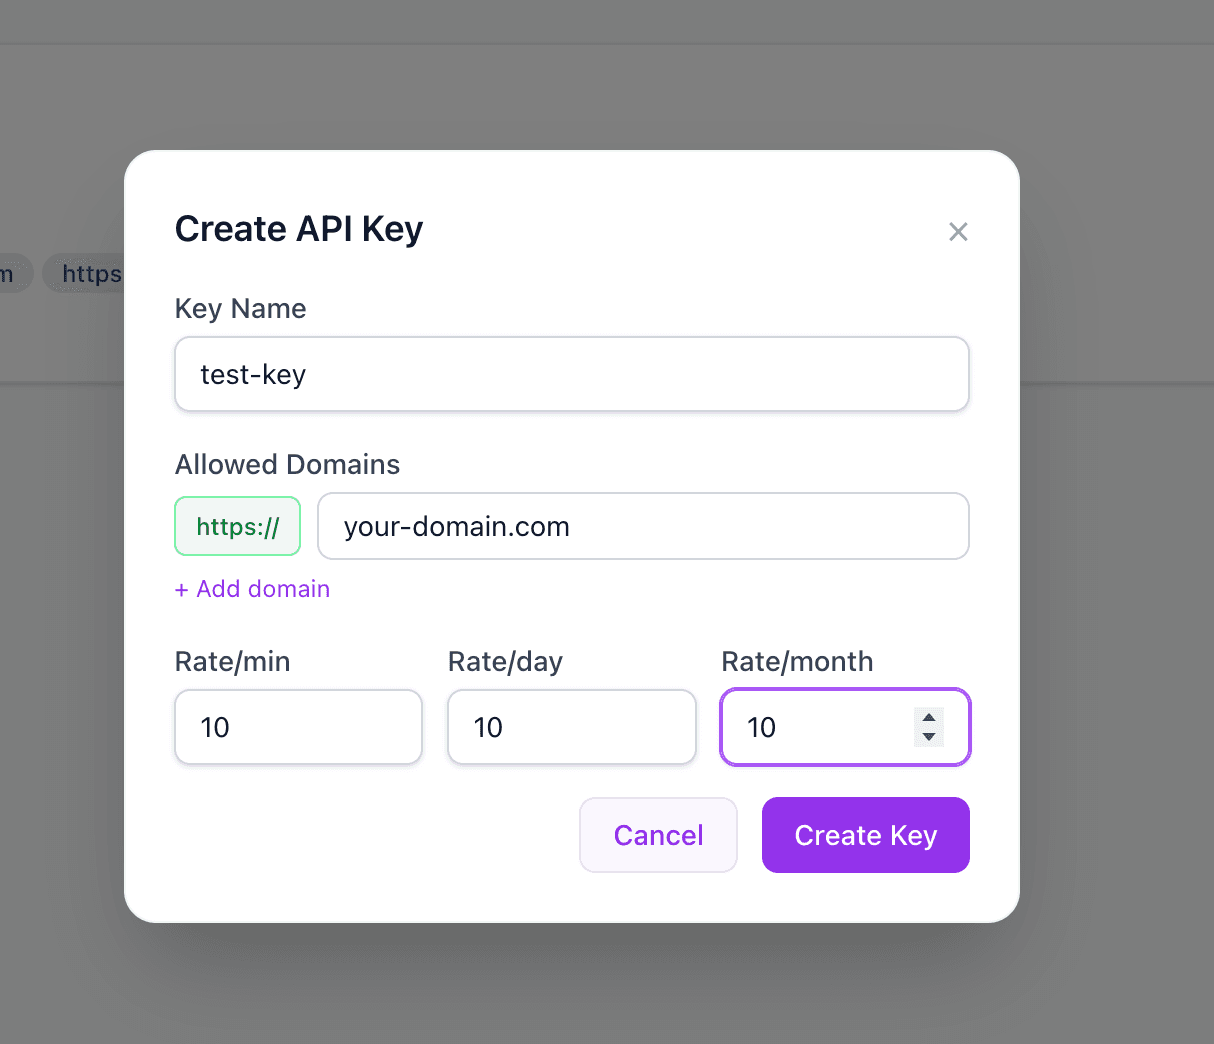
6Copy the API key
Important: The full API key is only displayed once when you create it. Copy it now and store it securely.

7Enable voices for your project
Browse the voice library, preview voices, and enable the ones you want to use.
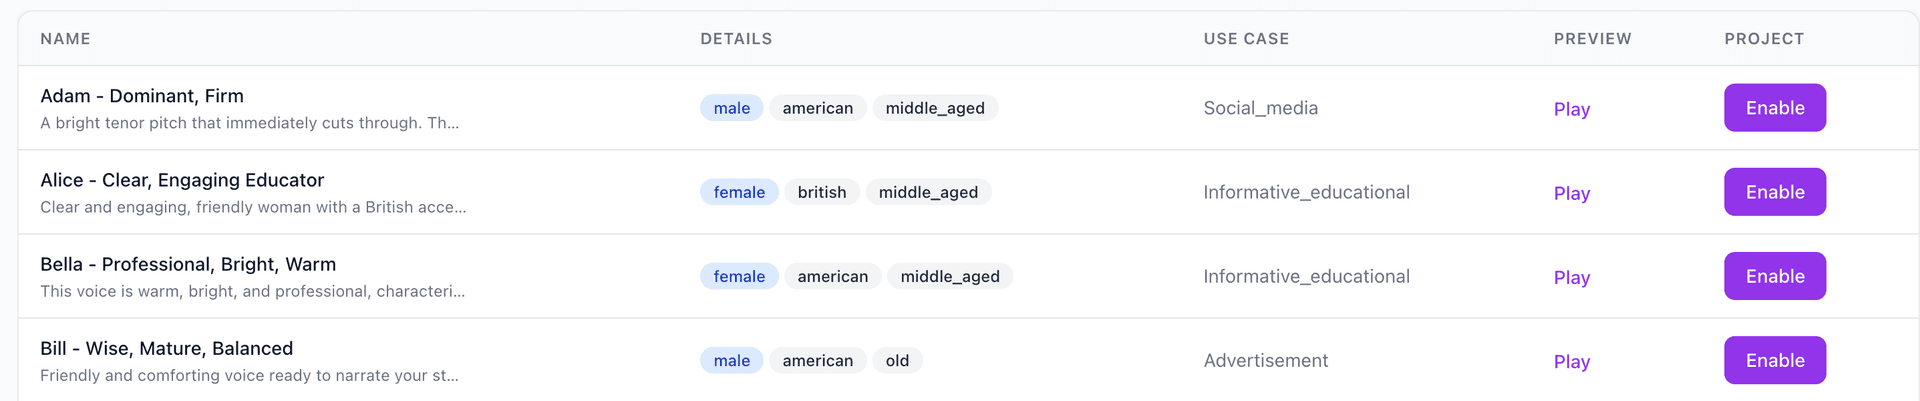
8Copy the voice ID

You now have everything you need:
- API key —
tts_abc123... - Project ID —
dcb9dba4-6438-... - Voice ID —
a1b2c3d4-...
Need help? Join our Discord community for support and questions.
Quick Start
1. Install the SDK
npm install @tts2go/reactRequires React 18+.
2. Wrap your app with the provider
import { TTS2GoProvider } from '@tts2go/react';

function App() {
  return (
    <TTS2GoProvider config={{
      apiKey: 'tts_your_api_key',
      projectId: 'your-project-id',
    }}>
      <MyPage />
    </TTS2GoProvider>
  );
}3. Add TTS to any text
Option A: Drop-in button
The simplest approach — a pre-styled button with animated play/pause/loading icons.
import { TTSButton } from '@tts2go/react';

function Article({ text }: { text: string }) {
  return (
    <div>
      <p>{text}</p>
      <TTSButton content={text} voiceId="voice-id" />
    </div>
  );
}Option B: Custom UI with hook
Build your own playback UI with full control over status, play, pause, and stop.
import { useTTS } from '@tts2go/react';

function PlayButton({ text }: { text: string }) {
  const { status, play, stop, pause } = useTTS(text, 'voice-id');

  return (
    <div>
      {status === 'playing' ? (
        <>
          <button onClick={pause}>Pause</button>
          <button onClick={stop}>Stop</button>
        </>
      ) : (
        <button onClick={play} disabled={status === 'loading'}>
          {status === 'loading' ? 'Loading...' : 'Play'}
        </button>
      )}
      <span>Status: {status}</span>
    </div>
  );
}How It Works
- 1
User clicks play — the SDK fires a request.
- 2
SDK checks the CDN — if the audio was generated before, it plays instantly from cache.
- 3
Browser speech synthesis — if not cached, the browser's built-in TTS provides immediate playback as a fallback.
- 4
Background generation — the SDK queues the content for ElevenLabs AI generation in the background.
- 5
Next play is instant — the next time anyone plays the same content, it loads from the CDN in high quality.
Ready to get started?
Create a free account and add ElevenLabs voice to your website in minutes.